SpringSecurity入门到实战
前言:放假了一直在敲项目,以前敲的品优购项目,下载尚未更新文章,其实已经作完几个大模块了,之因此迟迟没有更新就是,敲着停不下来,由于写文章实在是太费时间了,就舍不得停下来,这段时间敲的太多了,仍是更新一下,当作复习吧。此次讲的是SpringSecurity安全框架,可能相对比shiro来讲SpringSecurity会复杂的多,更多的公司会使用shiro,由于shiro简单易上手,基本已经知足通常公司的安全登陆操做了。可是仍是要学一下SpringSecurity的,毕竟有大厂在用,也是Spring家族中的东西。html
1、spring security 简介
spring security 的核心功能主要包括:java
- 认证 (你是谁)
- 受权 (你能干什么)
-
***防御 (防止伪造身份)web
其核心就是一组过滤器链,项目启动后将会自动配置。最核心的就是 Basic Authentication Filter 用来认证用户的身份,一个在spring security中一种过滤器处理一种认证方式。
 spring
好比,对于username password认证过滤器来讲, 会检查是不是一个登陆请求;是否包含username 和 password (也就是该过滤器须要的一些认证信息) ;若是不知足则放行给下一个。express
下一个按照自身职责断定是不是自身须要的信息,basic的特征就是在请求头中有 Authorization:Basic eHh4Onh4 的信息。中间可能还有更多的认证过滤器。最后一环是 FilterSecurityInterceptor,这里会断定该请求是否能进行访问rest服务,判断的依据是 BrowserSecurityConfig中的配置,若是被拒绝了就会抛出不一样的异常(根据具体的缘由)。Exception Translation Filter 会捕获抛出的错误,而后根据不一样的认证方式进行信息的返回提示。浏览器
注意:绿色的过滤器能够配置是否生效,其余的都不能控制。tomcat
2、SpringSecurity入门实战
- 建立一个普通的maven工程,打包方式为war
-
在 src/main/resources中加入以下文件安全
spring-security.xmlapp
<?xml version="1.0" encoding="UTF-8"?>
<beans:beans xmlns="http://www.springframework.org/schema/security"
xmlns:beans="http://www.springframework.org/schema/beans" xmlns:xsi="http://www.w3.org/2001/XMLSchema-instance"
xsi:schemaLocation="http://www.springframework.org/schema/beans http://www.springframework.org/schema/beans/spring-beans.xsd
                    http://www.springframework.org/schema/security http://www.springframework.org/schema/security/spring-security.xsd">

    <!-- 设置页面不登陆也能够访问 -->
    <http pattern="/login.html" security="none"></http>
    <http pattern="/login_error.html" security="none"></http>

    <!-- 配置页面的拦截规则  use-expressions="false"是否启用SPEL表达式-->
    <http use-expressions="false">
    <!-- 当前应乎必须属于ROLE_USER这个角色,才能够访问根目录以及所属子目录的资源 -->
        <intercept-url pattern="/**" access="ROLE_USER" />
        <!-- 开启表单登陆的功能 -->
        <form-login login-page="/login.html" default-target-url="/index.html" authentication-failure-url="/login_error.html"/>
        <csrf disabled="true"/>
    </http>

    <!-- 认证管理器 -->
    <authentication-manager>
        <authentication-provider>
            <user-service>
               <!--表示配置用户属于ROLE_USER而且配置用户登录的密码和帐号-->
                <user name="admin" password="123456" authorities="ROLE_USER"/>
            </user-service>
        </authentication-provider>
    </authentication-manager>
</beans:beans>框架
这里的不少东西都有注解了,说一下没有注解的标签,form-login标签表示配置一个登录的功能,login-page="/login.html"表示配置咱们本身登录的页面路径,如果没有配置form-login这个标签,SpringSecurity会自动帮咱们生成一个登录的页面,可是都不会用SpringSecurity给咱们生成的登陆页面,authentication-failure-url标示密码或者帐号错误跳转的页面,default-target-url表示密码或者帐号正确登录后跳转的页面,<csrf disabled="true"/>表示关闭csrf

 3. 配置web.xml
<?xml version="1.0" encoding="UTF-8"?>
<web-app xmlns:xsi="http://www.w3.org/2001/XMLSchema-instance"
xmlns="http://java.sun.com/xml/ns/javaee"
xsi:schemaLocation="http://java.sun.com/xml/ns/javaee http://java.sun.com/xml/ns/javaee/web-app_2_5.xsd"
version="2.5">
<context-param>
    <param-name>contextConfigLocation</param-name>
    <param-value>classpath:spring-security.xml</param-value>
 </context-param>
 <listener>
    <listener-class>
        org.springframework.web.context.ContextLoaderListener
    </listener-class>
 </listener>

 <filter>
    <filter-name>springSecurityFilterChain</filter-name>
    <filter-class>org.springframework.web.filter.DelegatingFilterProxy</filter-class>
 </filter>
 <filter-mapping>
    <filter-name>springSecurityFilterChain</filter-name>
    <url-pattern>/*</url-pattern>
 </filter-mapping>
</web-app>
这个就是个Spring的配置文件而已,相信不少人都能看懂
 4. 建立html页面

index.html
<!DOCTYPE html>
<html>
<head>
<meta charset="UTF-8">
<title>首页</title>
</head>
<body>
<h1>欢迎进入进入神奇的Spring-Security世界</h1>
</body>
</html>
login_error.html
<!DOCTYPE html>
<html>
<head>
<meta charset="UTF-8">
<title>Insert title here</title>
</head>
<body>
<h1>用户名密码错误</h1>
</body>
</html>
login.html
<!DOCTYPE html>
<html>
<head>
<meta charset="UTF-8">
<title>登陆</title>
</head>
<body>
--欢迎登陆个人系统--
<form action="/login" method="post">
用户名:<input name="username"><br>
密码:<input name="password"><br>
<button>登陆</button>
</form>
</body>
</html>
注意:特别说明一下login.html中东西,里面的form表单的提交,其中name="username"和name="password" 是必须的,由于SpringSecurity中默认就是以username和password来接受的,固然这个名字也能够改,可是通常沿用它的就好了,不必改,而后就是form表单的提交必须是method="post",提交的动做必须是action="/login",通常不作修改。 ##### 项目的目录结构为 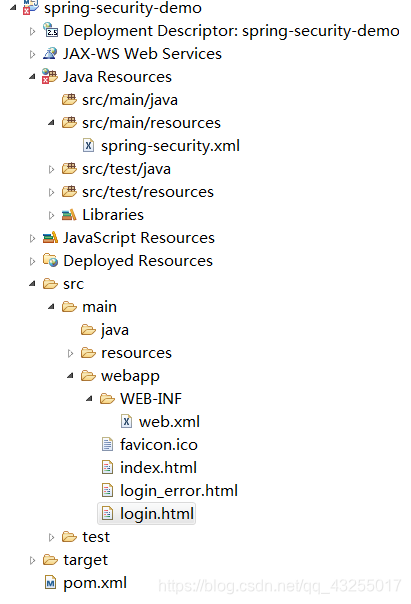 ### 3、测试 启动项目,由于是war项目,因此要配置tomcat来启动,启动的命令直接就是tomcat7:run就好了,如图表示启动成功,而后直接粘贴这个url到浏览器进行访问 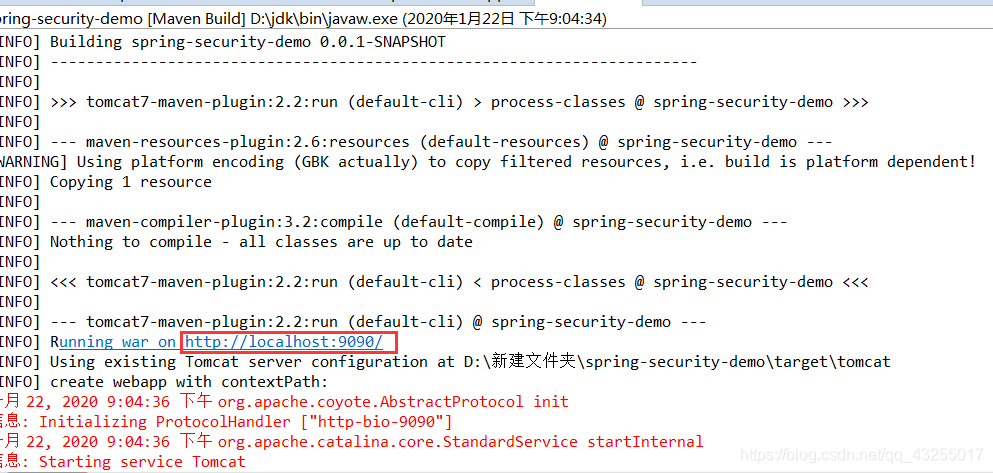 登录页面如图所示,咱们直接输入localhost:9090/index.html是不容许的,会被重定向到login.html页面中,如 图所示 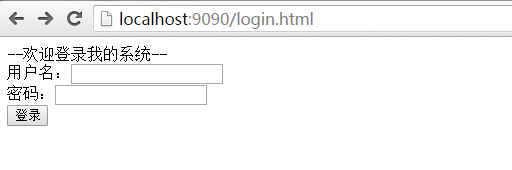 而后输入错误的密码或者帐号,如图所示,就会被重定向到错误的页面,这个使咱们本身配置的 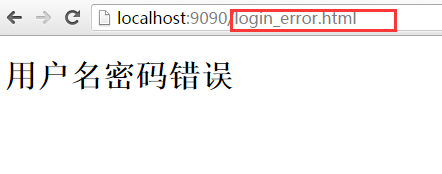 最后输入正确的密码和帐号,如图所示,就会直接t跳转到index.html页面中 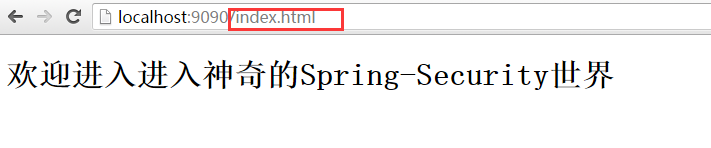
- 1. kylin入门到实战:入门
- 2. Redis从入门到实战:实战篇
- 3. docker从入门到实战-实战篇
- 4. SpringSecurity的入门
- 5. SpringSecurity入门demo
- 6. springsecurity入门
- 7. Flask入门到实战
- 8. Flutter从入门到实战
- 9. nmap从入门到实战
- 10. Python入门到实战
- 更多相关文章...
- • Memcached入门教程 - NoSQL教程
- • Neo4j数据库入门教程 - NoSQL教程
- • Java Agent入门实战(一)-Instrumentation介绍与使用
- • Java Agent入门实战(三)-JVM Attach原理与使用
-
每一个你不满意的现在,都有一个你没有努力的曾经。
- 1. 融合阿里云,牛客助您找到心仪好工作
- 2. 解决jdbc(jdbctemplate)在测试类时不报错在TomCatb部署后报错
- 3. 解决PyCharm GoLand IntelliJ 等 JetBrains 系列 IDE无法输入中文
- 4. vue+ant design中关于图片请求不显示的问题。
- 5. insufficient memory && Native memory allocation (malloc) failed
- 6. 解决IDEA用Maven创建的Web工程不能创建Java Class文件的问题
- 7. [已解决] Error: Cannot download ‘https://start.spring.io/starter.zip?
- 8. 在idea让java文件夹正常使用
- 9. Eclipse启动提示“subversive connector discovery”
- 10. 帅某-技巧-快速转帖博主文章(article_content)
- 1. kylin入门到实战:入门
- 2. Redis从入门到实战:实战篇
- 3. docker从入门到实战-实战篇
- 4. SpringSecurity的入门
- 5. SpringSecurity入门demo
- 6. springsecurity入门
- 7. Flask入门到实战
- 8. Flutter从入门到实战
- 9. nmap从入门到实战
- 10. Python入门到实战